Repair of explosion-proof electrical devices and lamps
 Explosion protection devices are used in explosive areas (premises). An explosive zone is a zone in which, according to the conditions of the technological process, flammable gases can be released in such a quantity that, in combination with air, they form an explosive mixture. There are several classes of premises according to the signs of an explosion.
Let's consider the main features of the repair of explosion-proof devices and lamps installed in rooms that are most dangerous in terms of explosion conditions. Repairs can be carried out only by those repair departments that are equipped with the necessary special equipment, tools, premises, have experienced repair personnel and have permission to repair explosion-proof devices.
The main conditions for repair include:
- increased requirements for the quality of the work performed,
- stricter rules for rejecting damaged parts and elements,
- the use of only such materials as are provided for in the project,
- increased requirements for testing and checking the repaired parts of the apparatus.
It is necessary to disassemble equipment and lighting fixtures with extreme care, avoiding damage, especially explosion-proof surfaces (marked "explosion"). Do not apply sharp blows and great efforts during disassembly. Fasteners that are difficult to screw must be pre-moistened with kerosene.
It is recommended to screw the fasteners in place after disassembly to avoid loss. The parts that need to be disassembled are marked with labels so that there are no installation errors during assembly.
Replace damaged parts. During the repair, it is necessary to ensure the maximum preservation of the factory parameters, which before the repair must be known to the repair personnel according to the manufacturer's drawings and technical documents.
Repaired, rebuilt or taken from spare parts, parts must be inspected and tested according to the relevant instructions and procedures.
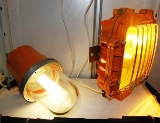
Rice. 1. Explosion-proof lamp VZG-200AM
The necessary tests — electrical, mechanical strength and explosion resistance — are carried out for all components, regardless of whether they are under repair or taken from spares, as they can be damaged during disassembly and transport.
Special requirements are imposed on the cleanliness of refractory surfaces ("explosion"), connections and dimensions of refractory gaps.
Small cavities with a diameter of up to 2 mm and a depth of up to 1 mm, notches, depressions found on the surfaces of flanges or holes are eliminated by soldering with solder POS -40 for steel parts, copper — for cast iron and metallization — for aluminum alloys, cleaning on previously damaged areas to a metallic luster.The use of lead is not permitted for these purposes.
In this way, removal of mechanical damage on explosion-proof surfaces is not allowed. The device or part of it in this case is rejected.
For devices whose contacts are immersed in oil, it is necessary to monitor the oil level in the tank, the parameters of its physical and chemical properties.
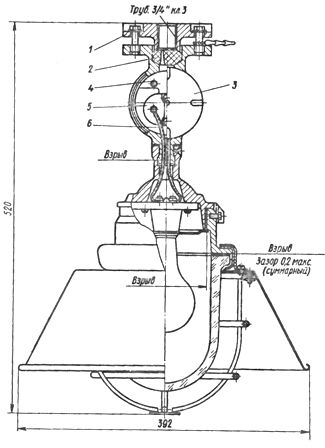
During the technical inspection of the lighting fixtures (Fig. 1), special attention is paid to the absence of cracks on the glass protective cap, the molded body, the sealing nuts of the input device.
When disassembling lighting fixtures for repair or replacement of lamps, check and establish the operability of the cartridge, cable connections and grounding contacts 4 and 5, the absence of voids or corrosion on the connecting planes, check the condition of the rubber seals 2, the insulation of the wire 6. Damaged elements are replaced by spare or restored ... Disassembly of lighting fixtures must be carried out with the mains disconnected, if the repair is related to the replacement of lamps, or in the workshop, if they are subject to major repairs.
For disassembly, use a special tool and perform it in the following sequence:
1. Unscrew the bolts 1, securing the pressure clutch with a wrench, and remove it.
2. Remove the rubber ring from the inlet socket.
3. Cover 3 at the entrance of the lighting unit is unscrewed with a key.
4. Check the condition of the terminals and grounding.
5. Unscrew the screws securing the reflector, protective net and glass.
6. Check the lamp.
When assembling, if necessary, replace the wire with a PRKS wire. Assembly is carried out in reverse order.