How to check the RCD
 The residual current device (RCD) has an extremely important function. It immediately activates in case of leakage current and completely disconnects users from the network, thus protecting people from accidental electrocution. This is true both in business and in everyday life. Current leakage can occur, for example, in case of accidental damage to the insulation of wires or due to fire. Thus, the importance of a properly functioning RCD is obvious.
To be sure of the operability of this device, you must regularly check it and of course, even before installation, you must make sure that it is in good working order and in accordance with the response parameters to the standards. Ideally, a preventive check should be done at least once a month.
Let's figure out how to check the serviceability of the RCD without resorting to the help of special services. Anyone who has installed circuit breakers at least once can easily cope with this task without using special devices. There are several simple ways to check the health and response parameters of the RCD, which will be discussed below.
Method number 1
Immediately after buying an RCD, you can check it without leaving the checkout, for this you need a finger battery and a piece of wire. It is enough to raise the lever of the RCD, and then connect the battery between the grounding input and the phase output. If the device is working properly and the battery is not dead, the shutdown should work immediately. If it doesn't work the first time, just turn the battery over. This is the easiest way to immediately check the RCD without having to plug it into the mains.
Method number 2
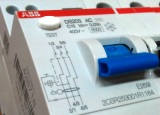
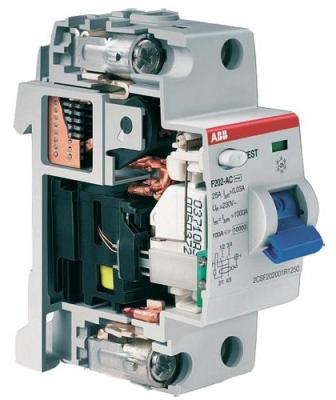
The residual current device has a TEST button, pressing which simulates a leakage current at the rated residual current level of this device. No special preparation is required to press the button, so anyone can also do this procedure.
The button is connected to a test resistor integrated in the device, the nominal value of which is chosen so that during the test a current flows through it no more than the maximum differential current for a given RCD, for example 30 mA. By pressing the button, users must immediately turn off, provided that the RCD itself is connected correctly, and even the presence of users is not necessary. Such a check is usually sufficient and is recommended to be carried out for prevention once a month, it is not difficult at all.
But what if there is no interruption after pressing the «TEST» button? This indicates the following: the device may not be connected correctly, check the connection again by reading the instructions; maybe the button itself does not work and the leak simulation system does not turn on, then a check using a different method will help; maybe there is a malfunction in the automation, this can be shown again by an alternative verification method.
Method number 3
One of the most common typical values of differential leakage current for household RCDs is 30 mA, using this rating as an example and considering the third test method.
If it is known that the differential leakage current of the RCD is 30 mA, and then with a resistance of 7333 Ohm, capable of dissipating a power of 6.6 W or more, it will not be difficult to check the operation of the RCD installed in the shield.
For this purpose, a 220 V, 10 W light bulb and a few suitable resistors are suitable. For example, we know that the resistance of the filament of such a 10 watt light bulb in the hot state is approximately equal to 4840 - 5350 Ohm, which means that we must add a 2 — 2.7 kΩ resistor to the bulb in series, a 2 — 3 watt bulb will do, or you need to dial from available resistors of suitable wattage.
To test an RCD using a bulb + resistor(s) circuit, there are two options:
The first option is suitable if there is a contact with a protective grounding contact in the apartment or in the house (where verification is required). It is enough to connect a light bulb with resistors at one end of a phase, and at the other end to the grounded electrode of the socket, and a working RCD will immediately work. If the operation does not occur, then either the RCD itself is faulty or the outlet contact is not properly grounded, then the second check option will be recorded.
The second option for checking with a bulb with resistors is connected directly to the RCD itself, which is also correctly connected to the network. We connect one end of our test circuit to the output of the RCD phase, and the other to the zero input of the RCD. A working device should work immediately.
To accurately calculate the test circuit ratings for a specific RCD, use Ohm's law for a section of a circuit, known to everyone since school.
In this method, the light bulb can be replaced with resistors, but for clarity, a light bulb circuit is more suitable, since resistors do not always fail. If you have no doubts about the health of the resistors, you can do without a bulb with suitable resistors. If the test fails and the RCD does not work, it must be replaced.
Method number 4
This method requires a light bulb, a resistor (just like the third method), an ammeter, and a dimmer or rheostat instead of a dimmer. The essence of the method is to determine the tripping threshold of your RCD by adjusting the simulation leakage current.
An electric circuit consisting of a light bulb and a resistor (resistors) is connected in series through a rheostat (dimmer) and an ammeter to the terminals of the RCD connected to the network, namely between the phase output and the zero input of the RCD. Then, gradually increasing the strength of the current with the help of a rheostat or dimmer, the current is fixed at the moment of tripping of the RCD.
Usually the RCD operates at a current lower than the rated current, for example, it is reported that the RCD of the IEK VD1-63 series with a rated differential current of 30 mA trips when tested in this way already at a 10 mA leakage current. In general, there is nothing wrong with this.
We hope that the methods described in this article to check the device for residual current will help you solve this problem. Anyone who knows how to handle a multimeter and is familiar with the safety rules can easily apply any of the methods described above.However, it will not be superfluous to remind: never neglect safety measures, it is better to again spend time and effort on the reliable installation of all circuits, sparing no effort, without electrical tape or even solder, than to pay with your life it's for sloppy installation.